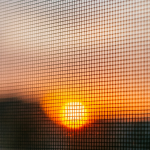
DIY Magnetic Car Screen
While summer is already half over, there is still time to enjoy some much-needed camping or a long road trip across the country. If you are planning a trip and have kids or pets, you are well accustomed to driving with the windows down and dealing with that occasional nagging bee or fly that always seems to find its way in your vehicle. Ditch the discomfort of those road trip bee stings by taking on this simple DIY and enjoy the great outdoors… without the bugs!
Gather your supplies:
- Large sheet of tracing paper or a roll of parchment paper
- Tape
- 12-15 Disc magnets (we recommend 1" x 1/8” Sewing Magnets)
- Pen or marker
- Large piece of mesh window/door screen (check your local hardware store or Amazon)
- Two yards of cotton fabric (or more if making multiple screens)
- Scissors
- Sewing pins
- Sewing thread
- Sewing machine
Get started on making your screen:
- Begin by placing the tracing paper over your car window and securing it with a few of your sewing magnets until the paper is taught. If you do not have access to tracing paper, you can utilize parchment paper pieced together with tape, employing the same method of attachment.
- Trace the outline of your window with a pen or marker and remove the paper from the window.
- Using a large surface area such as a tabletop or workbench, place the paper outline of your car window down with the piece of window screen over top of it.
- Place the cotton fabric over top of your screen, ensuring it reaches end to end.
- Cut thin strips a few inches in length for each of the four sides to be used as a fabric border.
- Lining up each strip accordingly, place one end of your fabric underneath the edge of the screen and add a few disc magnets on top of your screen, placing the other end of the fabric over your magnets and screen to secure the magnets in place.
- We recommend placing a pin between each of your magnets to hold them in place until you permanently sew them.
- Begin sewing along the far edge of your fabric to create your first seam, repeating this process to make a second seam.
- Next, sew a seam on each side of your magnets to hold them securely in place.
- Repeat this process for all four sides of your car window screen.
- Attach the new screen to the metal surrounding your car window in seconds and forget about bugs!
- Easily remove the cover when desired and store it in your trunk away from children and pets.
Discover Practical Solutions with the Power of Apex
You do not need to be a DIY expert to create magnetic hacks for your next road trip or to make tasks around the house a little easier. Armed with the power of our weekly blog and convenient online store, creativity is calling, and you can answer that call with Apex! Check out innovative DIYs, creative gifts, or brush up on the latest news in the world of magnets with the touch of a button. Prepare for your next project by grabbing your supplies from our store and getting the family involved for a bit of extra fun! With hundreds of blogs to choose from, you will never run out of ideas for your next magnetic marvel.
Our team would love to see your creations! Remember to share them with us on our Facebook page for a chance to be featured on our social media!

